Transverse asymmetry hides. You can spend ten minutes on a smile — shade, incisal edge position, tooth proportion — and miss that one side of the maxillary arch is sitting too far lingually. The teeth are behind the lips. The buccal corridor fills in on one side and disappears on the other. Until you pull the right records and superimpose them, the problem stays invisible. That's what this case was about.
Start With the Face, Not the Teeth
Every esthetic case begins in the same place: natural head position, patient upright, chin level. Skip that step, or rush it, and every decision that follows is built on a compromised foundation. Once she was positioned correctly, I evaluated the smile three-dimensionally — vertical, horizontal, and overall tooth display. Vertically, we were close. Horizontally, we weren't. The maxillary teeth were sitting too far lingually, hiding behind the lips instead of supporting them, and the smile looked narrow and flat.
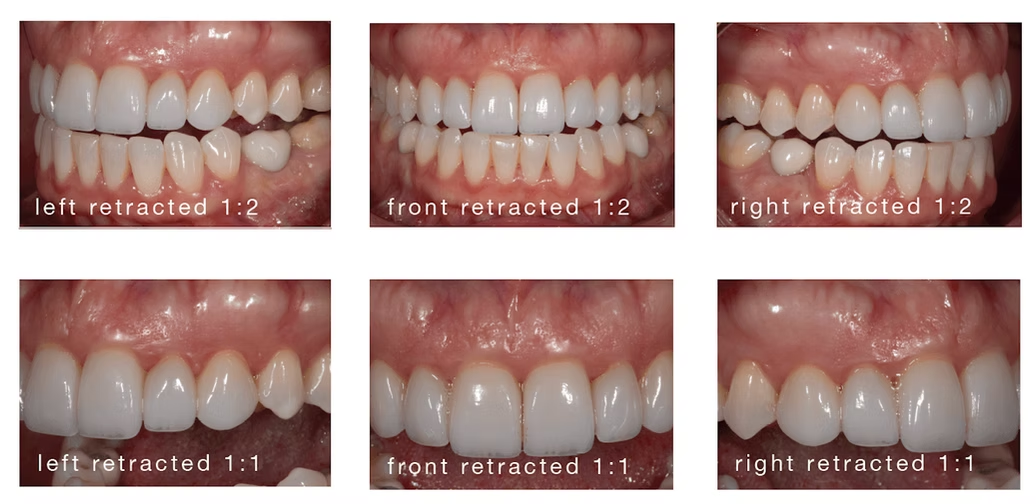
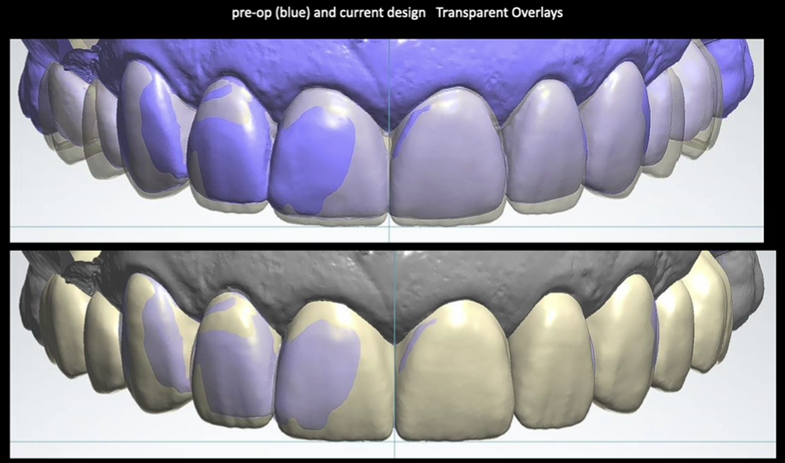
You won't catch that from a retracted photograph. You need the full face. You need the profile. You need to see where the teeth actually live within the facial frame. Retracted, the picture filled in more of the story — short-appearing teeth, rounded transitional line angles, a bulbous arch form without clear definition. But it was the digital superimposition from my lab that made the problem legible. The right side was facially deficient and needed to come out. The left side had excess volume and needed to come back. That's a transverse discrepancy, and you can't see it — let alone solve it — from retracted photos alone. Digital design showed us where each tooth needed to go before we committed to prep depth or material. You don't want to be figuring out arch form at the impression appointment.
Let the Case Choose the Material
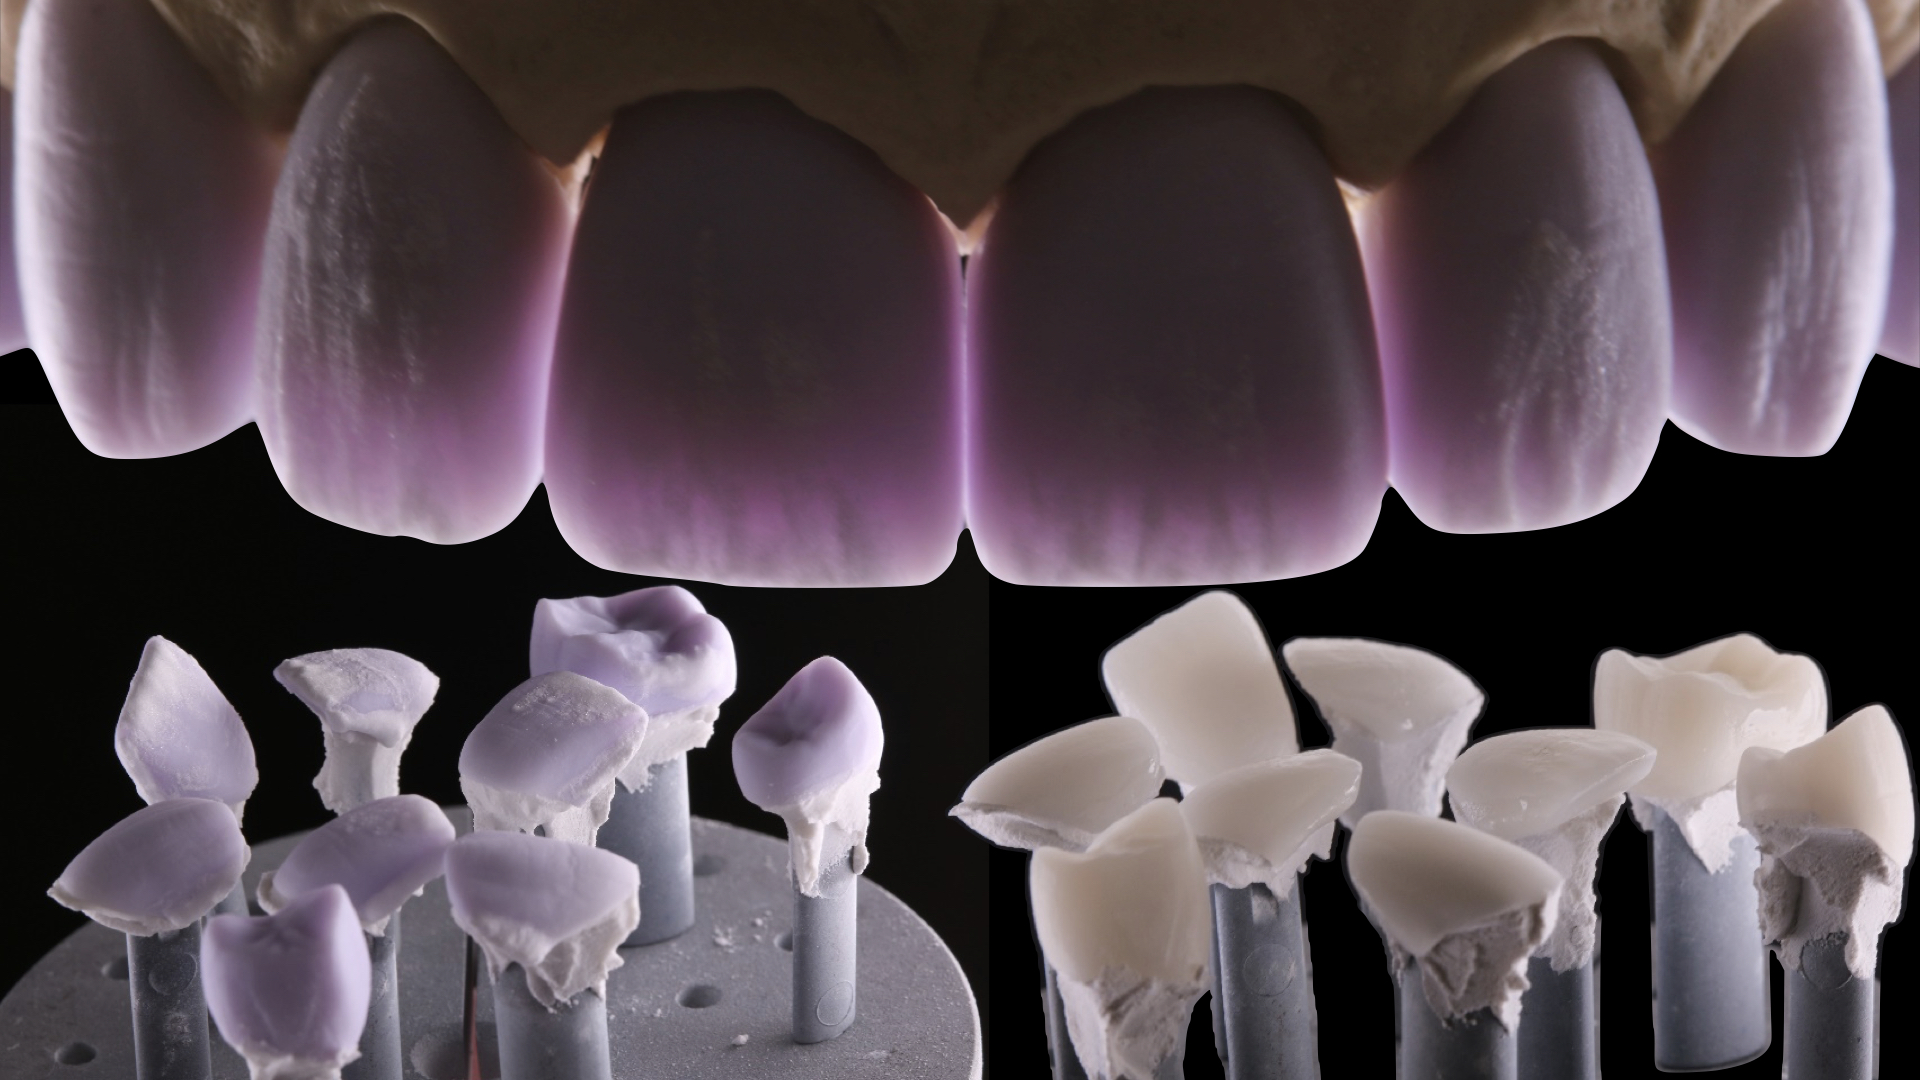
This patient had existing restorations and uneven prep depths from prior dentistry, so feldspathic was off the table. Feldspathic is unforgiving when thickness varies — the optical properties shift, and consistent color across the arch becomes almost impossible. Lithium disilicate gave us the flexibility to manage that variation. Here's the pearl: individual stump shade documentation for every prep is what lets the ceramist build intentionally different internal architectures, so the final color reads consistently even when one prep is 0.5mm and the next is 1.5mm. Without that documentation, you're asking your lab to guess.
Prove It in the Provisional
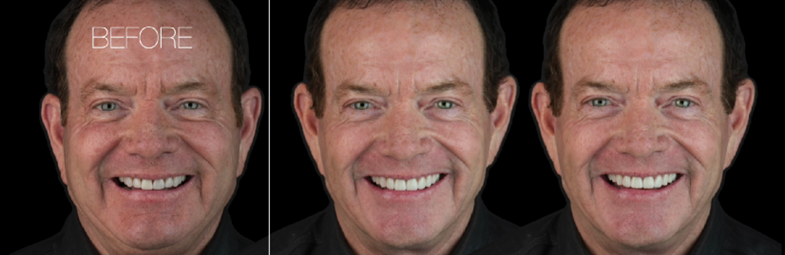
We built the provisionals to the design — filled out the deficient right side, reduced the overprojected left. Then I took the same full-face and retracted photography I used at the records appointment and put the two sets side by side. Not by eye. By comparing them directly against the original goal: did we get there? Symmetry improved. Lip support improved. The smile arc changed. Before I ever sent this case to fabrication, I had objective evidence that the design worked.
Digital planning and ceramic artistry aren't competing — they're sequential. Digital planning makes the invisible visible. What it can't do is build the depth, translucency, and micro-esthetics that skilled ceramic layering produces. Superimposing the provisionals against the proposed final design let us catch small refinements before fabrication. Small things are cheap in design. They're expensive in ceramic. This case was never really about veneers. It was about finding where the teeth belong within this patient's face, and building to that.
Three Key Takeaways from This Case
- Facial analysis comes first: Transverse asymmetry stays invisible without natural head position, a profile view, and superimposed arch-form data.
- Document stump shade by tooth: Individual stump shade isn't optional once prep depths vary across the arch.
- The provisional is where you prove the plan: It's where you confirm the design worked, not where you assume it did.